Get more reviews without any hassle. Our QR Code for Google Review page generator makes it simple for customers to leave feedback and boost your business.
How to import customer reviews from Google Business Profile
First, log in to your Wiremo Dashboard and go to Reviews (pin 1). In the right corner of the window press on the "Import reviews" button (pin 2).
In the opened pop-up window press on the "Import from Google" button.
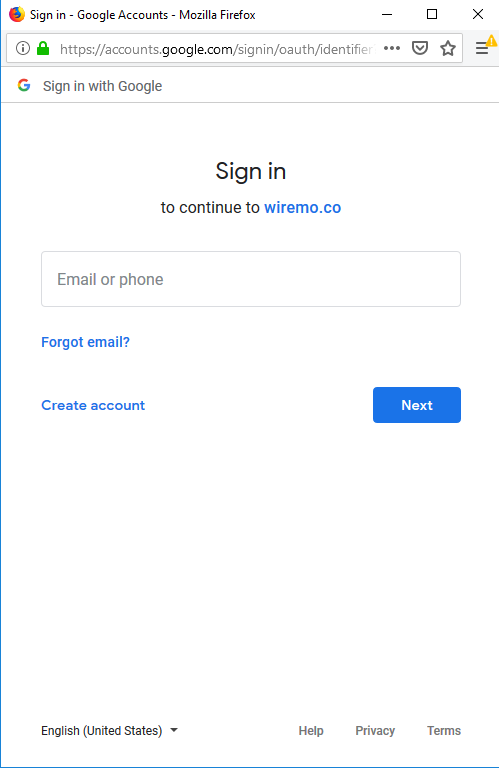
Now you need to sign in to your google account to continue.
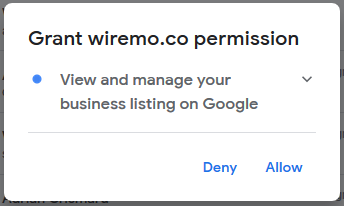
At the next step, you'll be asked to grant permission for Wiremo to manage your business listing.
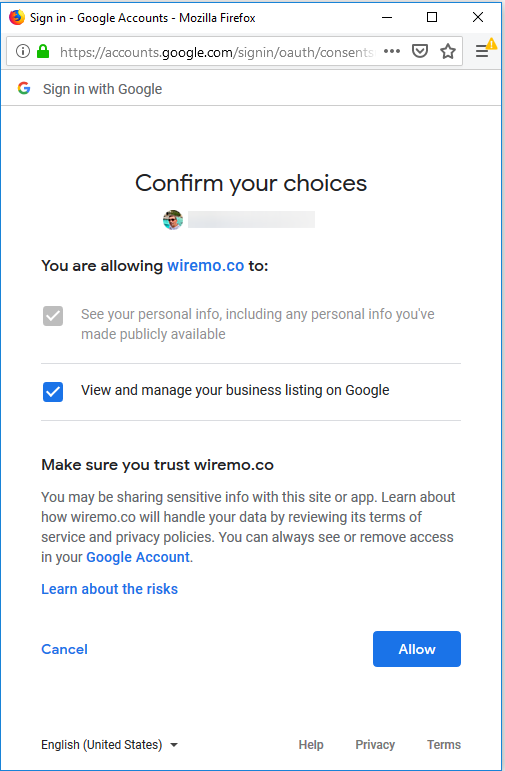
Check everything once again. To confirm just press the "Allow" button.
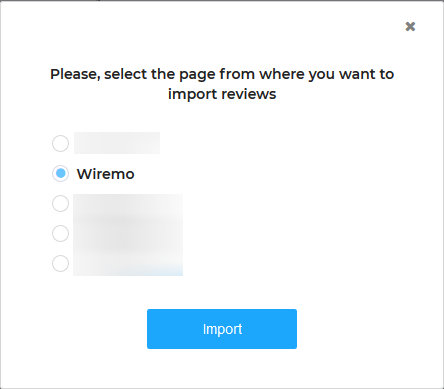
In case you have more than one business profiles, choose the profile you want to use to import reviews and press the "Import" button.
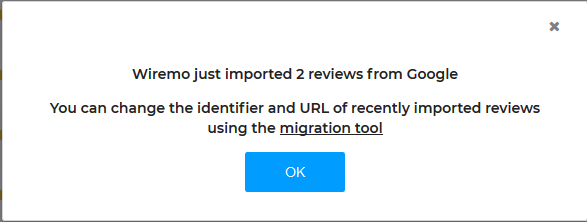
Once you're done you will see a pop-up showing you how many reviews were imported.
Important:We import only the reviews with text and the admin replies.
Important:After importing google reviews to Wiremo Dashboard it is very important to change the identifier and the reviews' URL. This way your reviews will be displayed properly. After importing the reviews the default identifier will be "pagename-page" and the default URL "host+/reviews/"
If you have any additional question please don't hesitate to contact our support team through live-chat or submit a ticket. Thank you for choosing Wiremo.
The most important thing for an eCommerce website is to get more money, constantly get reviews and to keep in touch with the customers. That's why we've designed Wiremo Conversations. Below, in this tutorial, we will try to explain why this feature is so important to use and how to do it. Read more →
Using ARR (Automated Review Request) is crucial if want to get more and more customer reviews, but much more important is to understand which campaign worked better. When is the conversion better, at the first email request or the second one? Below we will explain to you how to use, read and understand Wiremo ARR statistics.
ARR statistics - as easy as pie
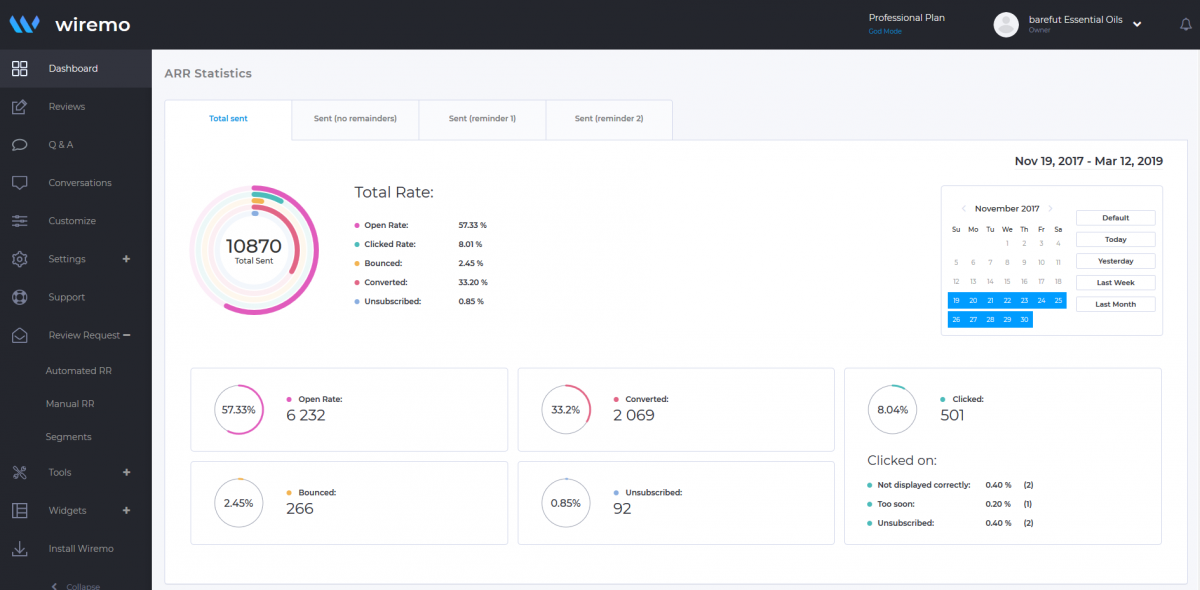
The image above is a screenshot from a real and running ARR campaign, provided by one of our customers - Barefut. Below we will describe every chart in it.
As you can see, there are some tabs. Every tab shows you the statistics using the same type of charts, but with different data.
Total sent - General stats about the current campaign. It includes all the emails that were sent including all reminders.
Sent (no reminders) - refers only to the first review request emails.
Sent (reminder 1) - refers only to the first reminder (if it was configured).
Sent (reminder 2) - refers only to the second reminder (if it was configured).
The charts in the tabs have the same design; the only difference are statistics.
We already mentioned that all the tabs are using the same type of charts. That's why we will explain to you what the charts show using the first tab. It is the main and general report.
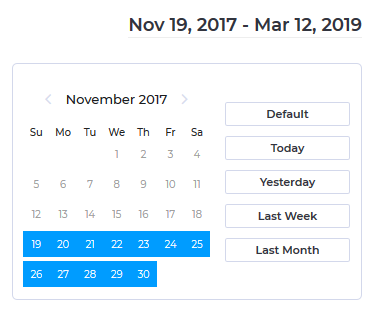
Choose the period
It is essential to have the possibility to understand how the campaign worked in different periods. Here you can select the period you want. By default, it will show you statistics from all the time, but you can select to see it for "Today", "Yesterday", "Last Week", "Last Month" or select a custom one using the calendar. If you want to get back and see stats for all period press on the "Default" button.
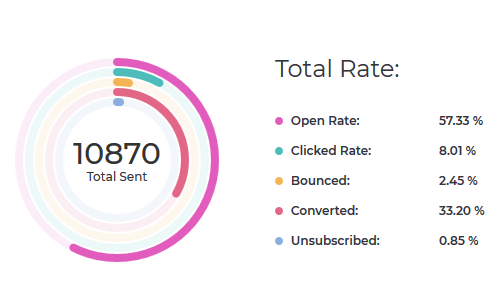
Total Rate Chart
The main chart shows the total rate in a visual way and percents. This way you can get the first impression if the campaign works well or there is something wrong. Here you can see:
Open rate - Email open rate is the percentage of the total number of people who opened an email from the current ARR.
Clicked rate - is the percentage of people who click on one of the elements from the email like the links "Not displayed correctly", "Too soon", "Unsubscribe" or your logo, product image or stars for the on-landing template. It is also important to understand that this rate is related to the opened emails.
Bounced - is the percentage of email addresses in your email list that didn't receive your review request because it was returned by a recipient mail server.
Converted - is the percentage of your customers who wrote a review.
Unsubscribed - the percentage of people who opt out from the current ARR, these customers won't get any review request emails anymore.
In the center of the main chart, you can see the total number of emails that were sent (it includes reminders and resent emails).
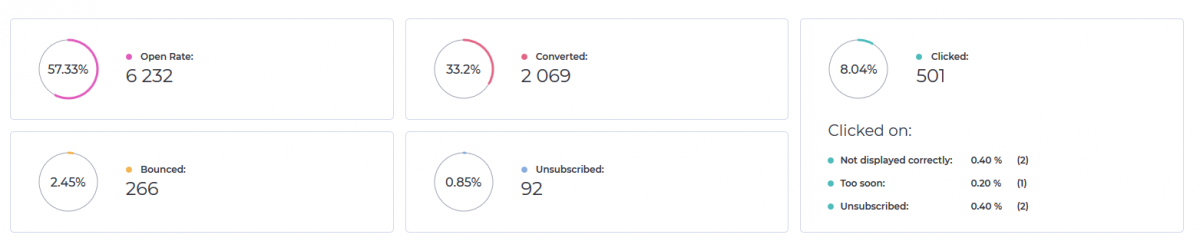
Detailed stats - The devil is in the detail
From the total rate chart, you can find general info in percentage, but it also essential to know the exact number of every of this percent. Below the total rate chart and the calendar you can find detailed statistics about the exact number of email that was opened, bounced, converted, unsubscriber and clicked. Also, we've designed a unique chart for the clicked email rate. You can find the exact number of emails for the links in email - "Not displayed correctly", "Too soon" or "Unsubscribe".
Important:Due to the fact that all the click stats was merged before 03/01/2019, the stats for Sent reminders 1 and 2 are unavailable for the ARR campaigns created before 03/01/2019. Starting this date all the email clicks will be noted separately and shown in the new statistics design.
If you have any question regarding ARR stats, don't hesitate to contact our support team. Thank you for choosing Wiremo.
Nowadays it is very important for online businesses to get, show and share customer reviews. And while it is much easier to show and share the reviews, when it comes to getting reviews it becomes a problem. The biggest challenge is that usually when there are some problems with the product they bought and want to leave a bad review. But what’s with all happy customers? If a client likes something, he will be enjoying it in silence.
Well, how to get reviews after every purchase? The answer is Automated Review Request from Wiremo. Below we will explain how to setup and use it.
Setup Wiremo
It’s easy as pie. All you have to do is to start a free trial. You can test all the features for 14 days.
After that find the detailed setup tutorial for your platform on oursupport page. Setup the plugin or widget and once it is setup properly, you can follow the steps below.
Create an email template
Before starting to ask your customers for reviews you should create and adjust an email template. With Wiremo you can create 2 types of emails: in-email and on-landing. The main difference between them is that in the first type the customers will have to select a rating, write the review and submit it directly in email without leaving it. In the second type, customers click on the rating and then are redirected to the landing page with your logo and Wiremo widget where they can write the review and submit it. The widget will auto-login your customer.
Also, there are some very important settings like:
On which day after purchase to send emails;
How many times to ask a customer for the review;
How to ask the customer that bought more than one product at a time;
And so on...
Please pay attention to all of them. It is very important not to overdue with the requests, because it could annoy your clients and they will provide you with bad reviews for this, instead of an objective and good review. We recommend to use one reminder.
Now once your template is ready it’s time to start the ARR.
Start Automated Review Request
If your site is on WooCommerce or Squarespace, you probably already installed the Wiremo plugin for your platform, so all you need to do is check these tutorials:
Once you’re done all you have to do is to wait for reviews to moderate them.
Other platform users can also setup and start the Automated Review Request. For this, you’ll need to submit a ticket in your dashboard to our support team to provide you the access to API.
Note:Access to API is available only for our Professional and Premium Plan users.
Work with stats
And the final and also important step is to work with stats. Once started, every ARR campaign will provide you information about how many emails were sent, opened, clicked, converted, bounced and so on.
It is very important to check all this. Sometimes, for different regions and business models, the in-email or on-landing requests works differently. Periodically, you should make some tests campaign with different email templates, different subject and text (the subject in email is very important), to find the best working campaign for you.
All these elements will help you get more and more customer reviews and increase your customer loyalty, improve SEO and finally get more sales and money.
Usually, business owners want to use the business name instead to the First and Last name in widget and notification emails. Below we will explain to you how to adjust these settings.
Use business name instead First and Last Name
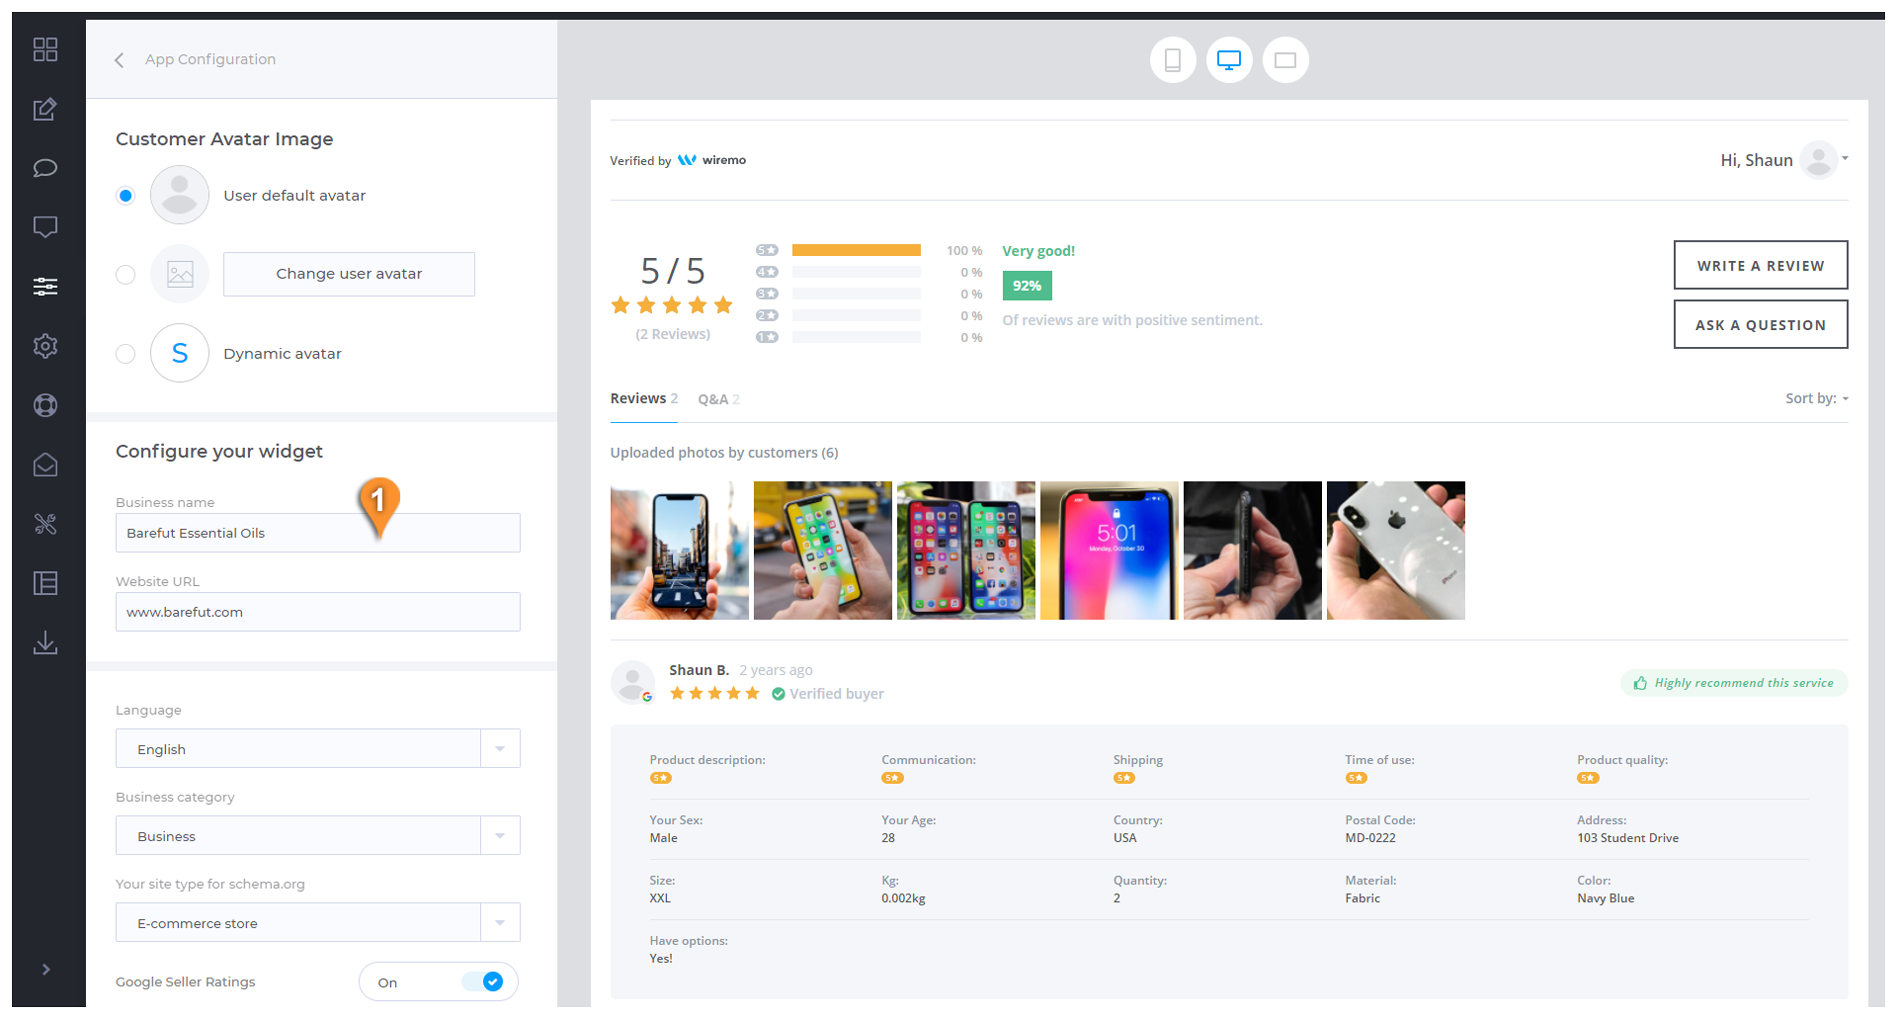
This setting will enable the use of the business name in the widget and in notification emails. To set up your business name simply login to your Wiremo Dashboard, then go to Customize ⇒ App Configuration. Now in the "Configure your widget" block type the name wish in the "Business name" input box (pin 1). Please don't forget to scroll down and press the "Save" button. Below you can see some screenshot of the customization, provided by one of our customers.
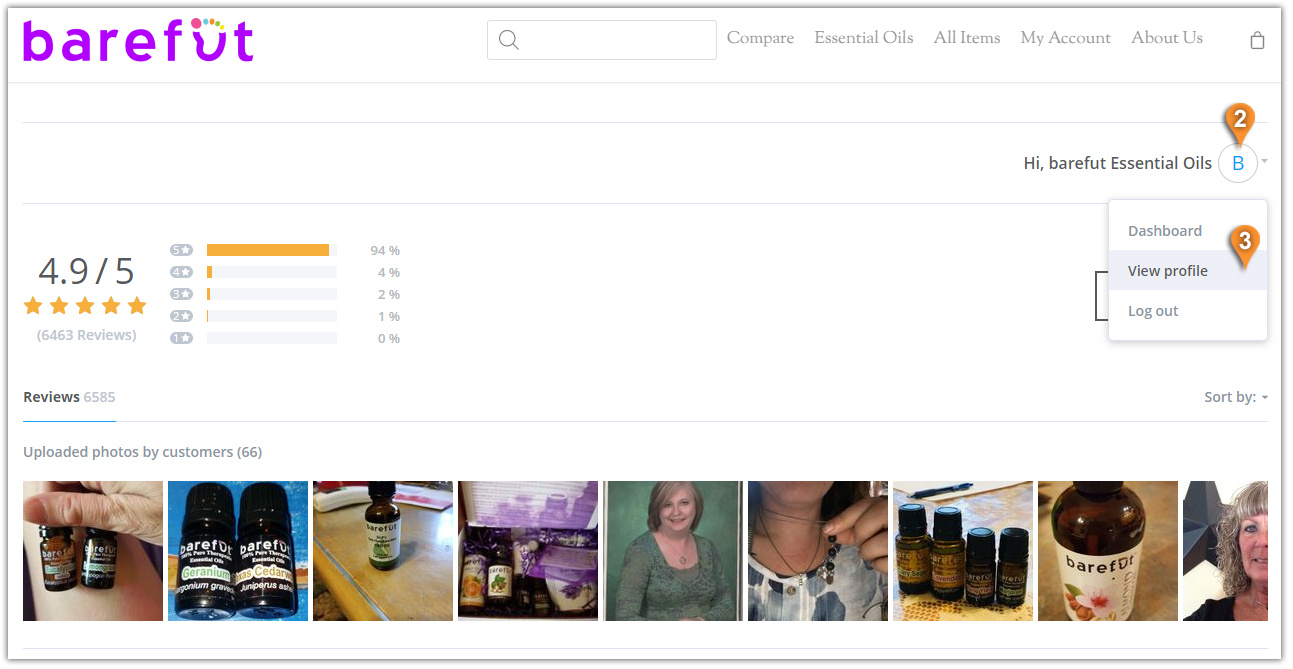
Now go to your website and open the page where you've set up the Wiremo widget. In the widget, press on your profile image (pin 2) and select "View profile" (pin 3)
In the Profile settings window just press on the checkbox "Use business name instead." (pin 4) and then press the "SAVE" button (pin 5).
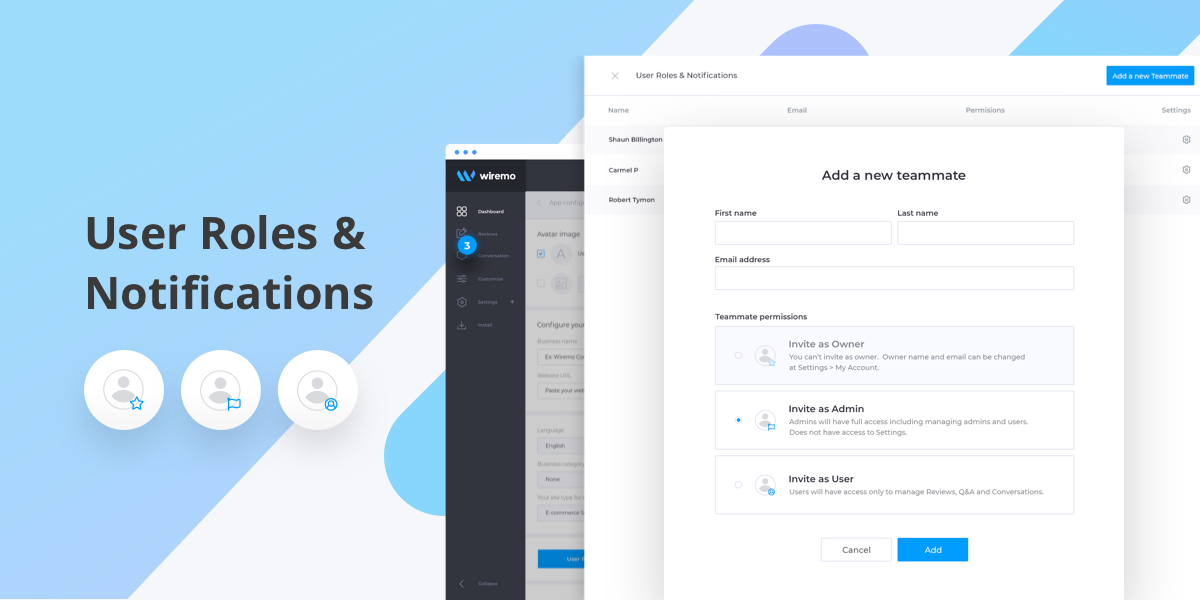
It's our great pleasure to announce the official launch of a new and very useful feature - Multiple User Roles. If you have more than one website, then you need much more time to moderate your reviews. Now, with this great new feature, you can delegate these responsibilities to your coworkers. In this post, we will show you how to add new teammates.
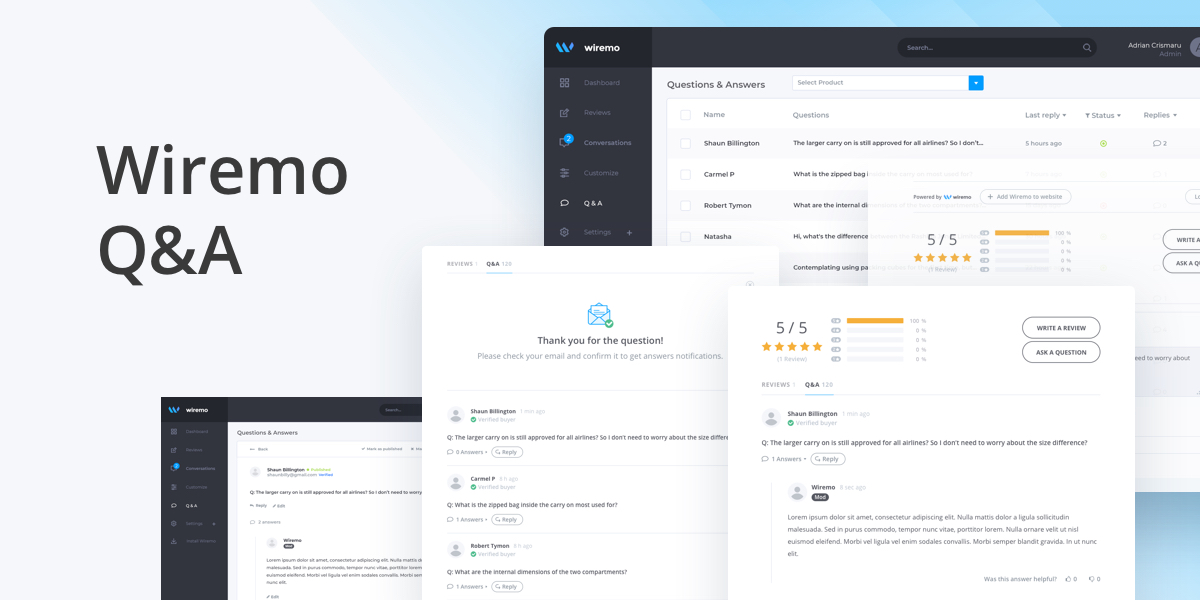
We are proud, and it's our great pleasure to announce the official launch of a new and great feature - Questions and Answers (Q&A) for our customer reviews widget. In this post, we will show you how to set it up and get the maximum out of it.Read more →
Welcome to Wiremo! We know that many of you had a lot of past orders before start using Wiremo. That's why we've created the possibility to ask your past orders for review. Below we will explain to you how to set up a Review Request campaign for your past orders in the Wiremo plugin for WooCommerce.
Video tutorial
For an easier way to use Wiremo Past Orders Review Request on the WooCommerce website, you can watch the following video tutorial or follow the steps below it.
Note:If you are using ARR for past orders, it is essential to know that we take all the information and the product ID itself from the order form. If you deleted that product and created a new one back, the review for the old product will not appear on the new product. Is not a lost review, you can migrate it.